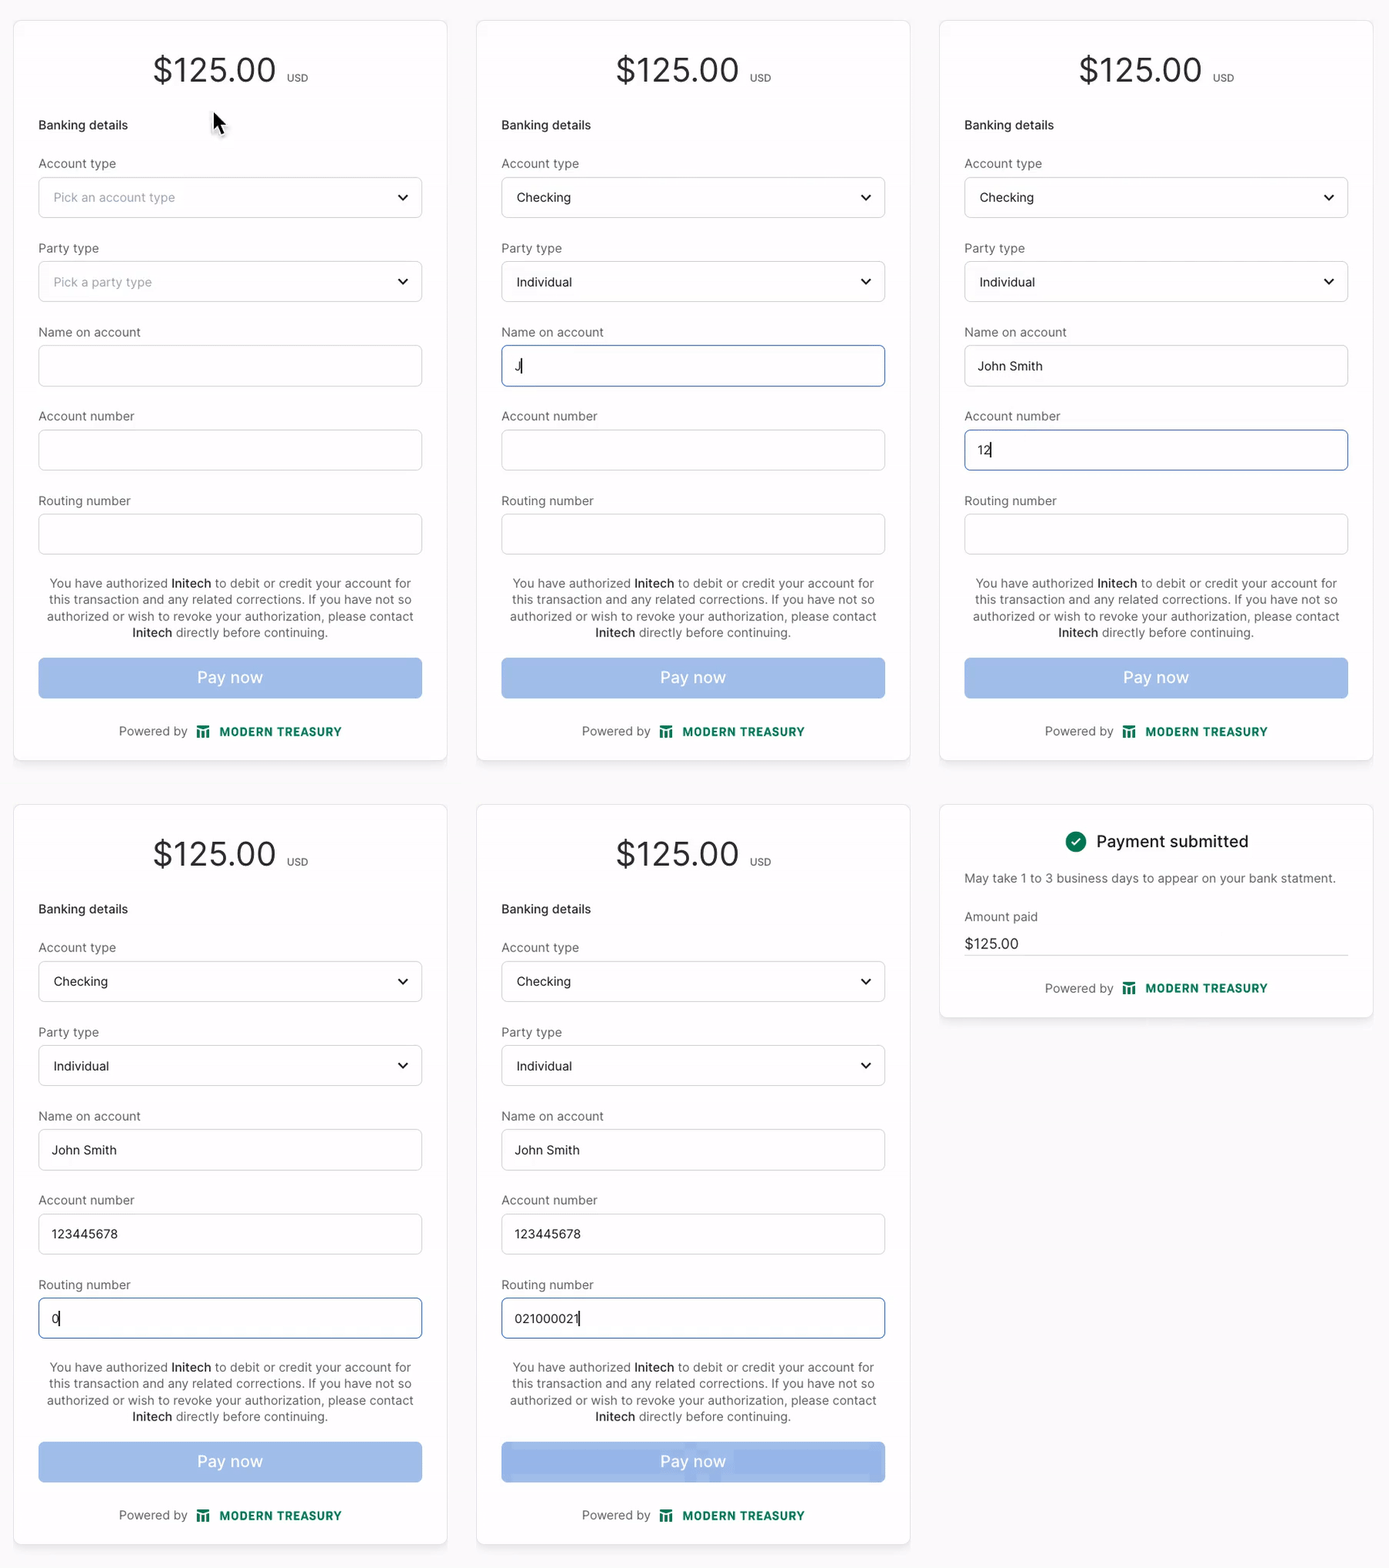
Initiate a payment using pre-built UI
A pre-built UI to collect bank account details from end users and charge them

This guide describes how to embed this pre-built Payment Flow UI in your application. The Payment Flow is currently tailored to collect domestic US account details and initiate ACH debits, but in the future global account types and payment types will be supported.
1. Retrieve your API Key
Dashboard: Go to your API Keys page. There you will find your Organization ID and API keys. Your default Sandbox or Production keys have the appropriate permissions. Otherwise, create or modify an API key to have manage permissions for Developer Resources.
2. Create a Counterparty
Server-side: Create a counterparty for the end user whose bank account information you will be collecting.
curl --request POST \
  -u ORGANIZATION_ID:API_KEY \
  --url https://app.moderntreasury.com/api/counterparties \
  -H 'Content-Type: application/json' \
  -d '{
    "name": "John Johns"
  }'
The API request will return a Counterparty object, and the id will be used in the next step.
{
  "id":"37ba4454-dd33-4aa0-8906-0e2e4103e45c",
  "object": "counterparty",
  "name": "John Johns",
  "email": null,
  "send_remittance_advice": false,
  "metadata": {},
  "accounts": {},
  "live_mode": true,
  "created_at": "2019-11-09T00:11:07Z",
  "updated_at": "2019-11-09T00:11:07Z"
}
3. Create a Payment Flow
Server-side: Create a Payment Flow
In addition to the counterparty_id, specify the originating_account_id you want to initiate the payment from as well as the amount, currency, and direction of the payment. Modern Treasury will customize the embedded form to collect the necessary information required for this payment.
curl --request POST \
	-u ORGANIZATION_ID:API_KEY \
	--url https://app.moderntreasury.com/api/payment_flows \
	-H 'Content-Type: application/json' \
	-d '{
		"amount": "499",
		"currency": "USD",
		"direction": "debit",
		"counterparty_id": "37ba4454-dd33-4aa0-8906-0e2e4103e45c",
		"originating_account_id": "37ba4454-dd33-4aa0-8906-0e2e4103e45c"
	}'
This API request will return a Payment Flow object. The client_token will be used in future steps.
{
  "id": "d93b8ae4-b30e-42ce-bc5d-e1ca5785f863",
  "object": "payment_flow",
  "live_mode": true,
  "client_token": "pay-live-fmsXHyYikKHstYHeSB6Co5AjezMqKoFKFhKmwnY2tvJMUFmndkarJY7GcwYkcBvr",
  "status": "pending",
  "amount": 499,
  "currency": "USD",
  "direction": "debit",
  "counterparty_id": "37ba4454-dd33-4aa0-8906-0e2e4103e45c",
  "receiving_account_id": null,
  "originating_account_id": "37ba4454-dd33-4aa0-8906-0e2e4103e45c",
  "payment_order_id": null,
  "created_at": "2023-02-18T03:50:54Z",
  "updated_at": "2023-02-18T03:50:54Z"
}
Only use API Keys server-side
Please make sure you are creating
CounterpartyandPaymentFlowobjects from your backend servers. API Keys are secret, and should not be used directly in client-side applications.
4. Retrieve Publishable API Key
Dashboard: Go to your Publishable API Keys page. There, you will find your Publishable API Keys. If you do not have one, create one.
5. Mount the Workflow
Add modern-treasury-js
modern-treasury-js Client-side: You first need to add modern-treasury-js to your application. We recommend installing the library from NPM, but you can also directly install the script from our CDN.
npm install --save @modern-treasury/modern-treasury-js
yarn add @modern-treasury/modern-treasury-js
<script src="https://cdn.moderntreasury.com/js/v1/modern-treasury.js"></script>
Initialize ModernTreasury
ModernTreasuryClient-side: Initialize ModernTreasury with your Publishable API Key from the previous step.
import { loadModernTreasury } from "@modern-treasury/modern-treasury-js";

const modernTreasury = await loadModernTreasury("publishable-test-MDAiy2...");
const modernTreasury = ModernTreasury("publishable-test-MDAiy2...");
Create an Embeddable Flow
Client-side: The next step is to create the EmbeddableFlow. You must pass the client_token from the previous step. While not required, we recommend defining an onSuccess callback to handle what happens after an end-user successfully completes the flow. Similarly, we recommend defining an onError callback to handle any unexpected errors. Visit createEmbeddableFlow documentation for full details.
import { EmbeddableFlow } from "@modern-treasury/modern-treasury-js";

const embeddableFlow: EmbeddableFlow = modernTreasury.createEmbeddableFlow({
  clientToken: "pay-test-rWbNg...",
  onSuccess: (result) => { /* Navigate to your next page */ },
  onError: (error) => { /* Handle errors */ }
});
const embeddableFlow = modernTreasury.createEmbeddableFlow({
  clientToken: "pay-test-rWbNg...",
  onSuccess: (result) { /* Navigate to your next page*/ },
  onError: (error) => { /* Handle errors*/ }
});
(Optional) Customize Appearance
Client-side: You can customize the appearance of embeddable flows to match the look and feel of your application. Check out our createEmbeddableFlow documentation to see how to customize properties like colors and font.
Mount the Embeddable Flow
Client-side: Now that you have an EmbeddableFlow, you need to add it to the DOM. You can mount the flow to a valid CSS selector or a DOM element. After successfully mounting, the end-user will be able to start progressing through the flow.
embeddableFlow.mount("#put-iframe-here")
embeddableFlow.mount("#put-iframe-here")
Summary
After following all of these steps, you may have something that looks like this:
import React, { useEffect } from "react";
import { loadModernTreasury } from "@modern-treasury/modern-treasury-js";

function App() {
  useEffect(() => {
    const initModernTreasury = async () => {
      const modernTreasury = await loadModernTreasury("publishable-test-MDAiy2...");

      if (modernTreasury) {
        const embeddableFlow = modernTreasury.createEmbeddableFlow({
          clientToken: "pay-test-rWbNg...",
          onSuccess: (result) => { /* Handle Success */ },
          onError: (error) => { /* Handle Error */ }
        });

        embeddableFlow.mount("#put-iframe-here");
      }
    };

    void initModernTreasury();
  }, []);

  return (
    <div className="App">
      <div id="put-iframe-here" />
    </div>
  );
}
<!-- To run this example locally you'll need to serve the page, this can be done by -->
<!-- running `python3 -m http.server 8081` in the same directory as the html file. -->

<!DOCTYPE html>
<html>
  <script src="https://cdn.moderntreasury.com/js/v1/modern-treasury.js"></script>
  <body>
    <h1>My Heading</h1>
    <div id="put-iframe-here"></div>
  </body>
  <script>
    // Initialize Modern Treasury library
    const mt = ModernTreasury("publishable-test-MDAiy2...");

    // Create the Embeddable Flow
    const embeddableFlow = mt.createEmbeddableFlow({
      clientToken: "pay-test-rWbNg...",
      onSuccess: (result) => { /* Handle Success */ },
      onError: (error) => { /* Handle Error */  },
    });

    // Mount the Embeddable Flow
    embeddableFlow.mount("#put-iframe-here")
  </script>
</html>
6. End-User Submits Account Details
Client-side: Once the flow is mounted, the end-user will follow the embedded Payment flow and submit their account details. Once complete, we will create an ExternalAccount associated with the given Counterparty and a PaymentOrder and save both of these to the PaymentFlow. We will also move the PaymentFlow#status to completed and call the onSuccess callback so that you can customize your success behavior and navigate to the next page.
Updated 12 months ago