Configure NetSuite role using existing default
NetSuite utilizes "roles" as a way to control permissions and access to the various parts of the account. In order to connect Modern Treasury to NetSuite, you need to create a role with the necessary permissions.
NetSuite accounts ship with some default roles, which make it easier to get started. This guide walks through using an existing, default role, making it easier to get set up. If you prefer to grant the minimal permissions, you can follow our other guide: Configure NetSuite role
Step 1. Duplicate Accountant Role
Accountant RoleNavigate to Setup > Users/Roles > Manage Roles and locate the Accountant role. Typically it is the role with an ID of 1. In the Edit column, click Customize.
Step 2. Set name
We recommend using "Modern Treasury" and only using this role for the Modern Treasury integration.
Step 3. Allow access to subsidiaries or entities

Subsidiaries vs. EntitesIn some versions of NetSuite, they use "entity" in place of "subsidiary." You can treat the two interchangeably in this guide. We will import the necessary entities for you to later use subsidiaries in Modern Treasury.
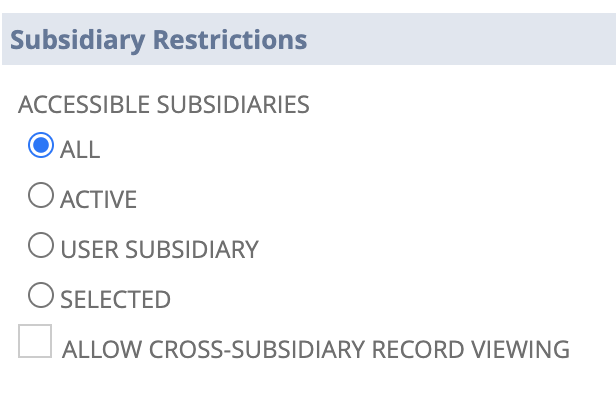
To grant access, select the appropriate value under Subsidiary Restrictions or Entity Restrictions:
| Permission | Description |
|---|---|
| All | Will give access to all subsidiaries/entities. |
| Active | Will give access to only active subsidiaries/entities. |
| User Subsidiary | Will give access to only the subsidiary/entity associated with the user. |
| Selected | Will give access to the specified subsidiaries/entities. |
Step 4. Set permissions for chosen subsidiaries/entities
Under the Permissions > Lists tab, click Add to add the following permission:
| Permission | Level |
|---|---|
| Subsidiaries | View |
Step 5. Save the role
Click the Save button, and the role is now ready for use. You can now continue connecting NetSuite: Connect NetSuite
Updated 17 days ago