Push-to-Warehouse Setup: Google Cloud Storage
In this guide, you will be setting up a connection to a data warehouse destination you own. Reach out to your Customer Success Manager or [email protected] to confirm that your Modern Treasury plan includes the Push to Warehouse capability.
Prerequisites
- Please reference our Push to Warehouse IP Address documentation.
Step 1: Create a service account
- In the GCP console, navigate to the IAM & Admin menu.
- Click into the Service Accounts tab.
- Click Create service account at the top of the menu.
- In the first step, name the service account that will be used to transfer data into Cloud Storage and click Create and Continue. You may continue through the following steps without assigning any roles, and in the final step, click Done.
Step 2: Create destination GCS bucket
- Navigate to the Cloud Storage page.
- Click Create.
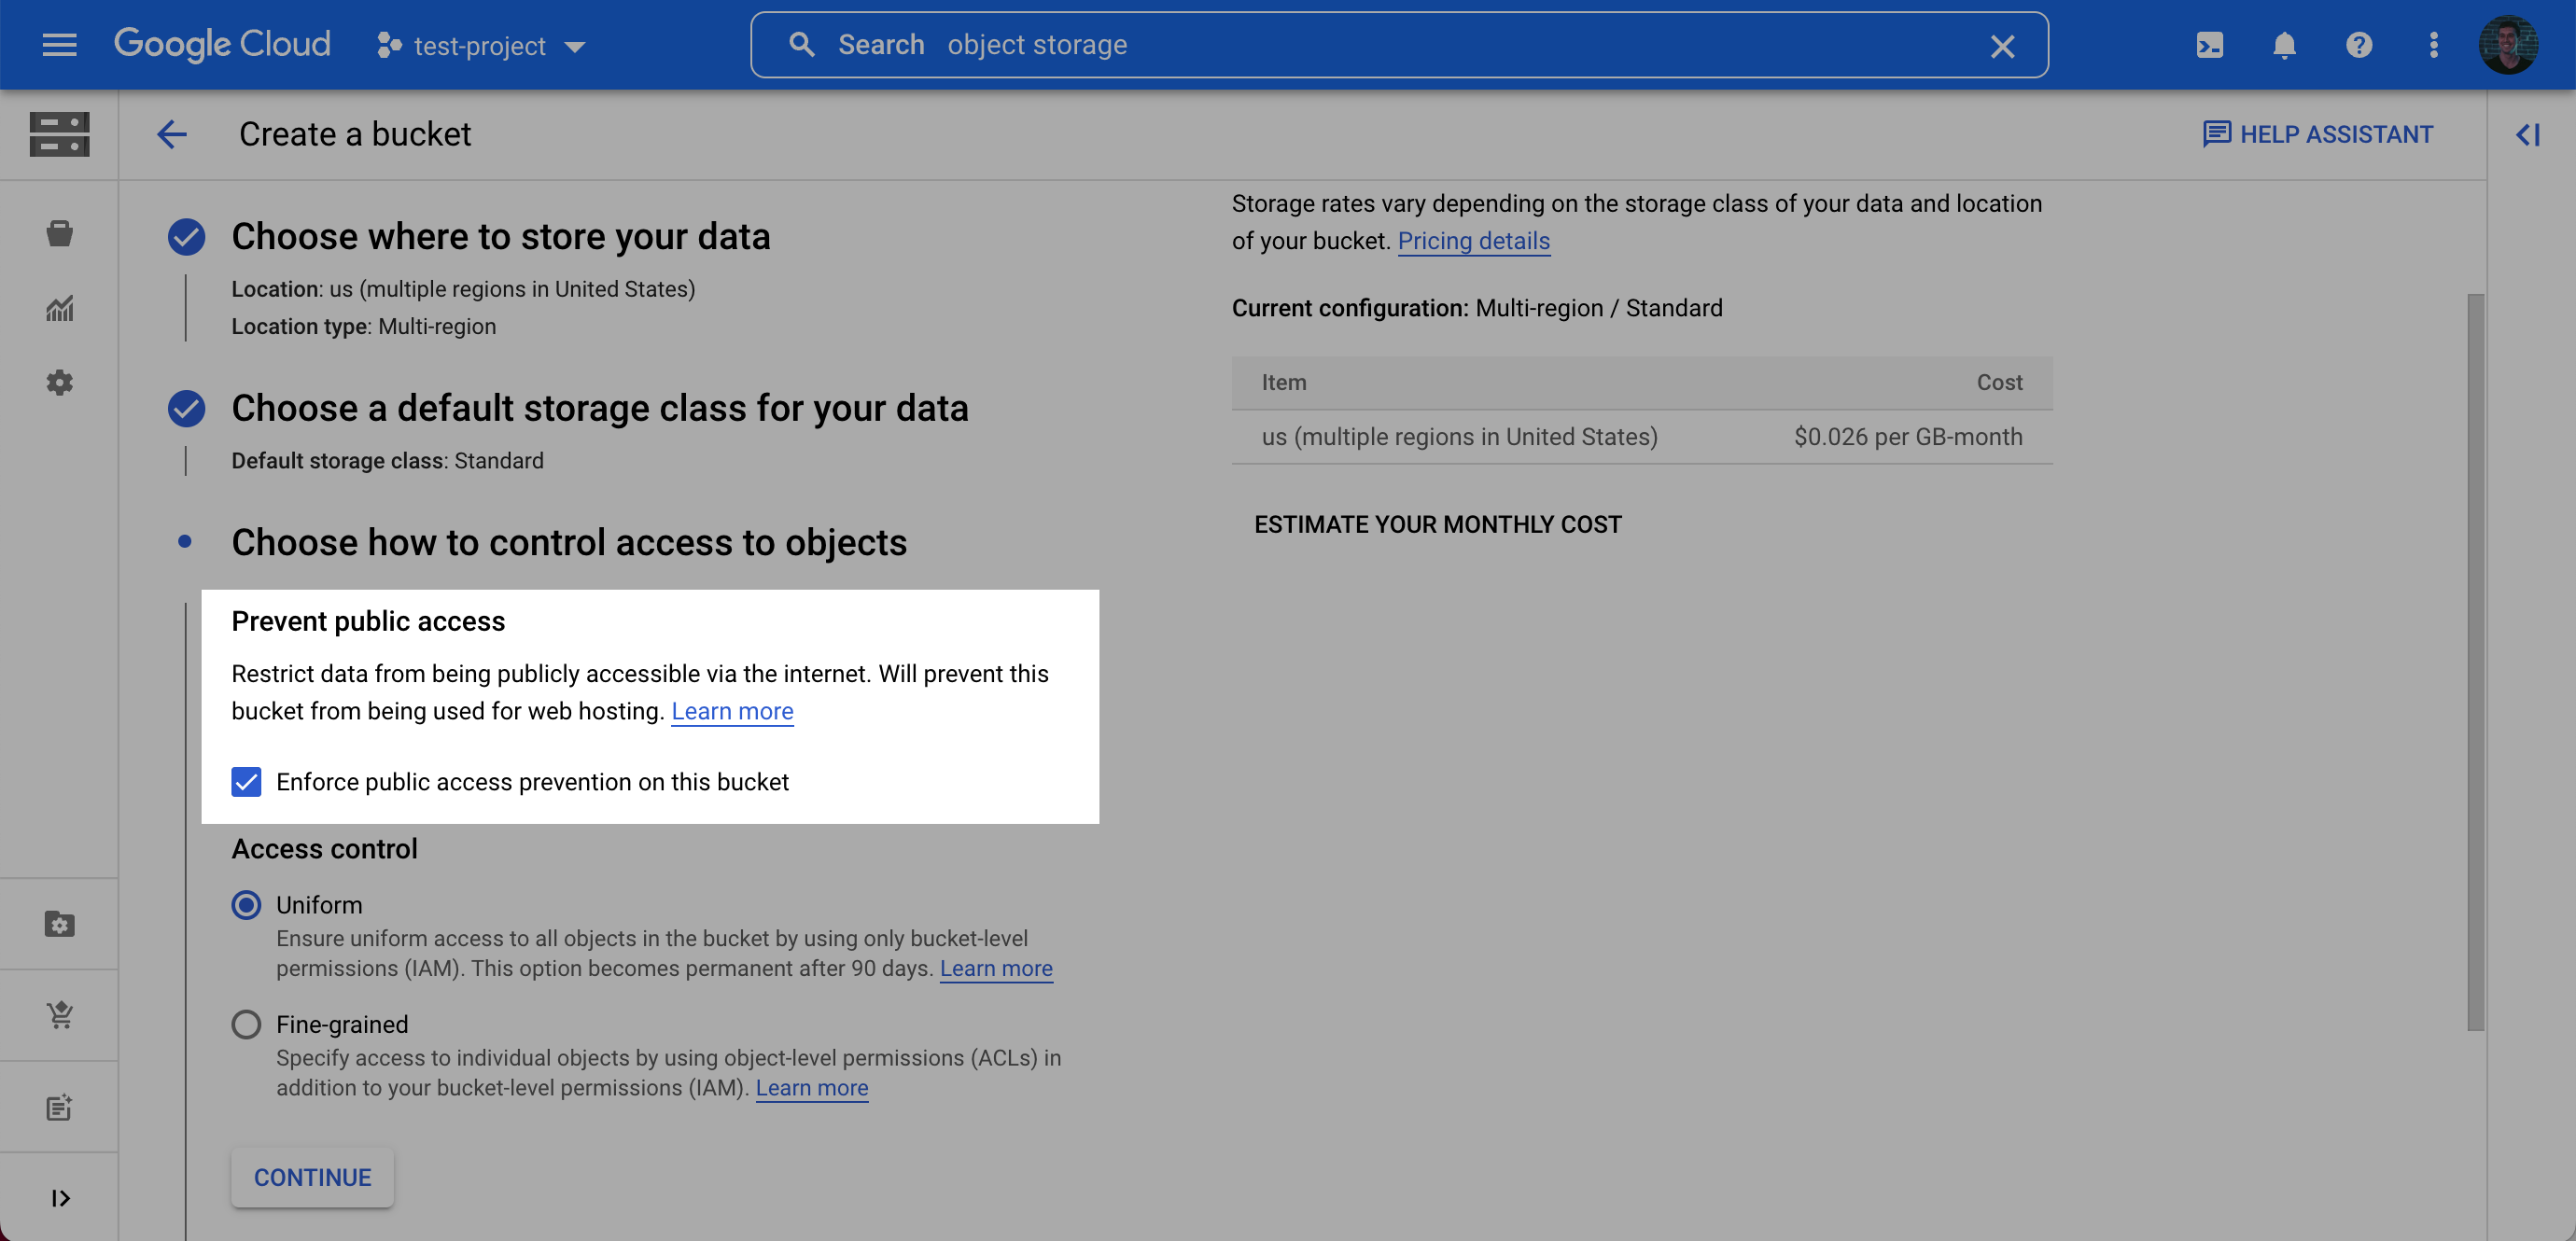
- Enter a bucket name, choose a region. Note: at the Choose how to control access to objects step, we recommend selecting Enforce public access prevention on this bucket.

- After choosing your preferences for the remaining steps, click Create.
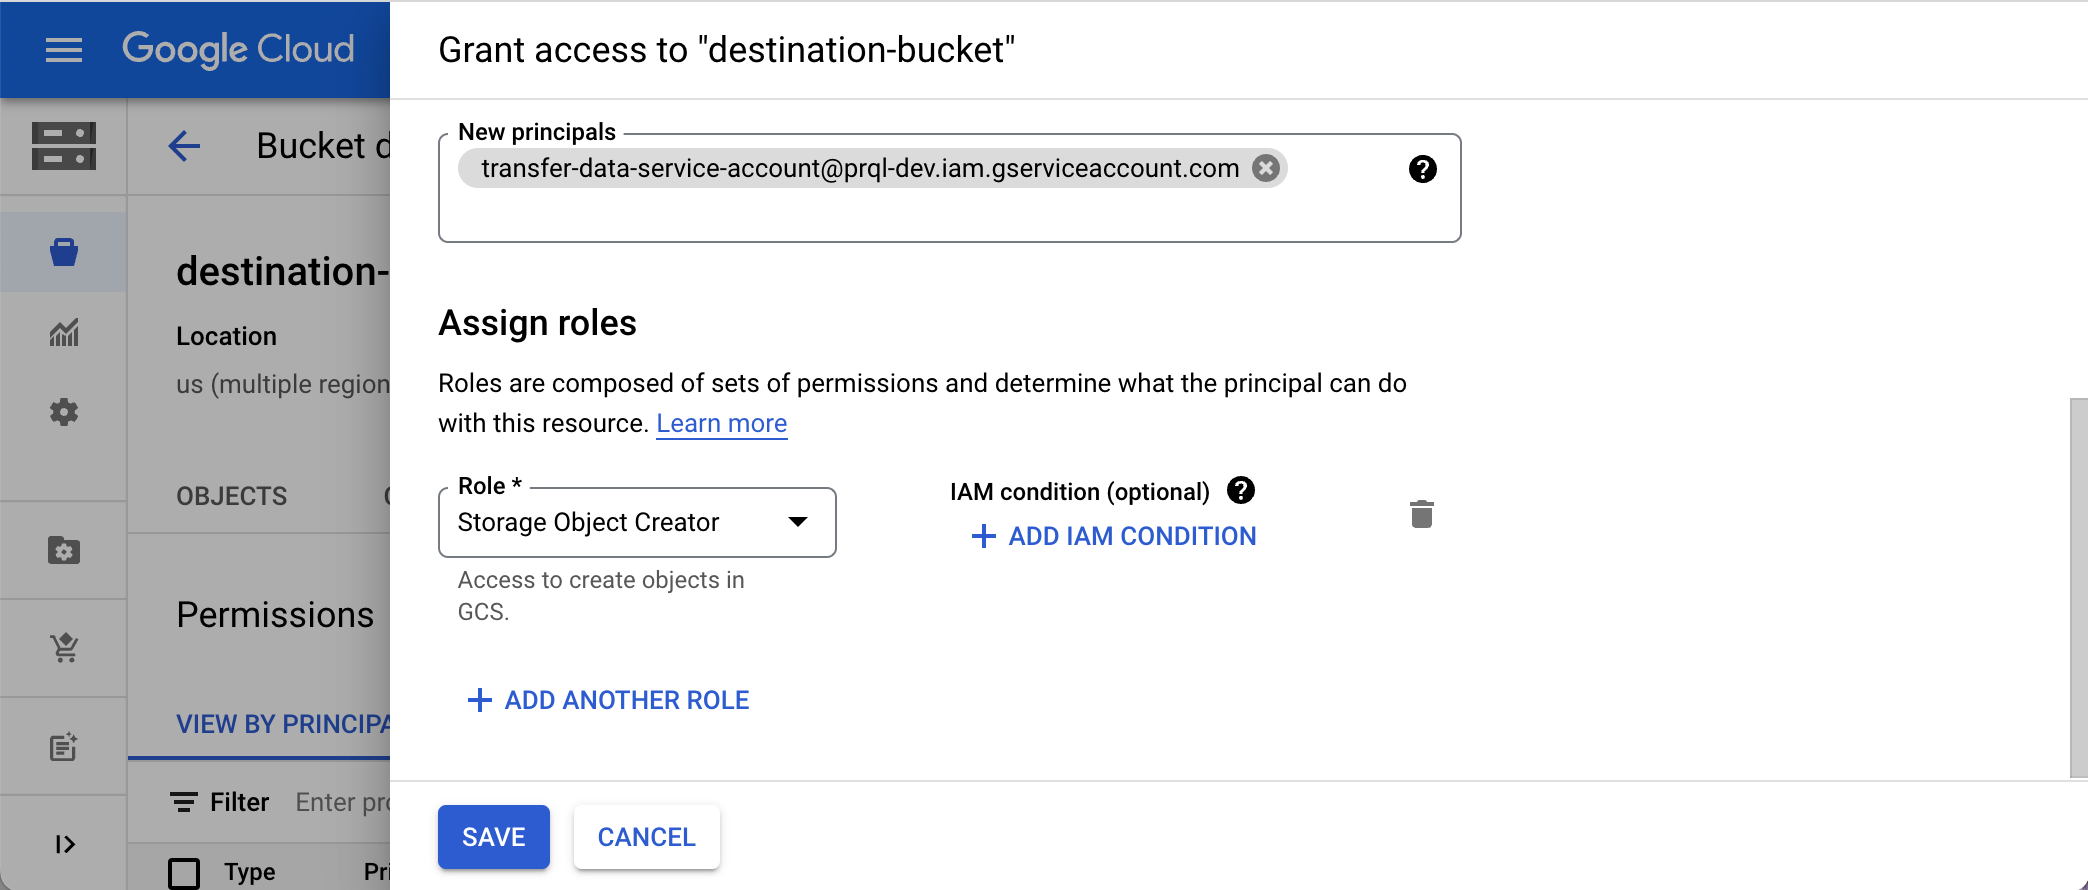
- On the Bucket details page for the bucket you created, select the Permissions tab, and click Grant access.
- Grant access to the principal (Service Account) you created in Step 1, and assign the Role: Storage Object Creator. Click Save.

Step 3: Generate HMAC key
An HMAC key is a type of credential and can be associated with a service account or a user account to access Google Cloud Storage.
- Navigate to the Cloud Storage page.
- Click into the Settings tab on the left side menu.

- Navigate to the Interoperability tab and click the Create a key for a Service Account button.
- Select the Service Account created in Step 1, and click Create key.

- Make a note of the Access key and Secret.
Step 4: Add your destination
Securely share your bucket name, your chosen folder name for the data, and your bucket secret key with us to complete the connection.
Updated 7 months ago