Push-to-Warehouse Setup: BigQuery
In this guide, you will be setting up a connection to a data warehouse destination you own. Reach out to your Customer Success Manager or [email protected] to confirm that your Modern Treasury plan includes the Push to Warehouse capability.
Prerequisites
- Please reference our Push to Warehouse IP Address documentation.
Step 1: Create service account in BigQuery project
- In the GCP console, navigate to the IAM & Admin menu.

- Click into the Service Accounts tab.

- Click Create service account at the top of the menu.

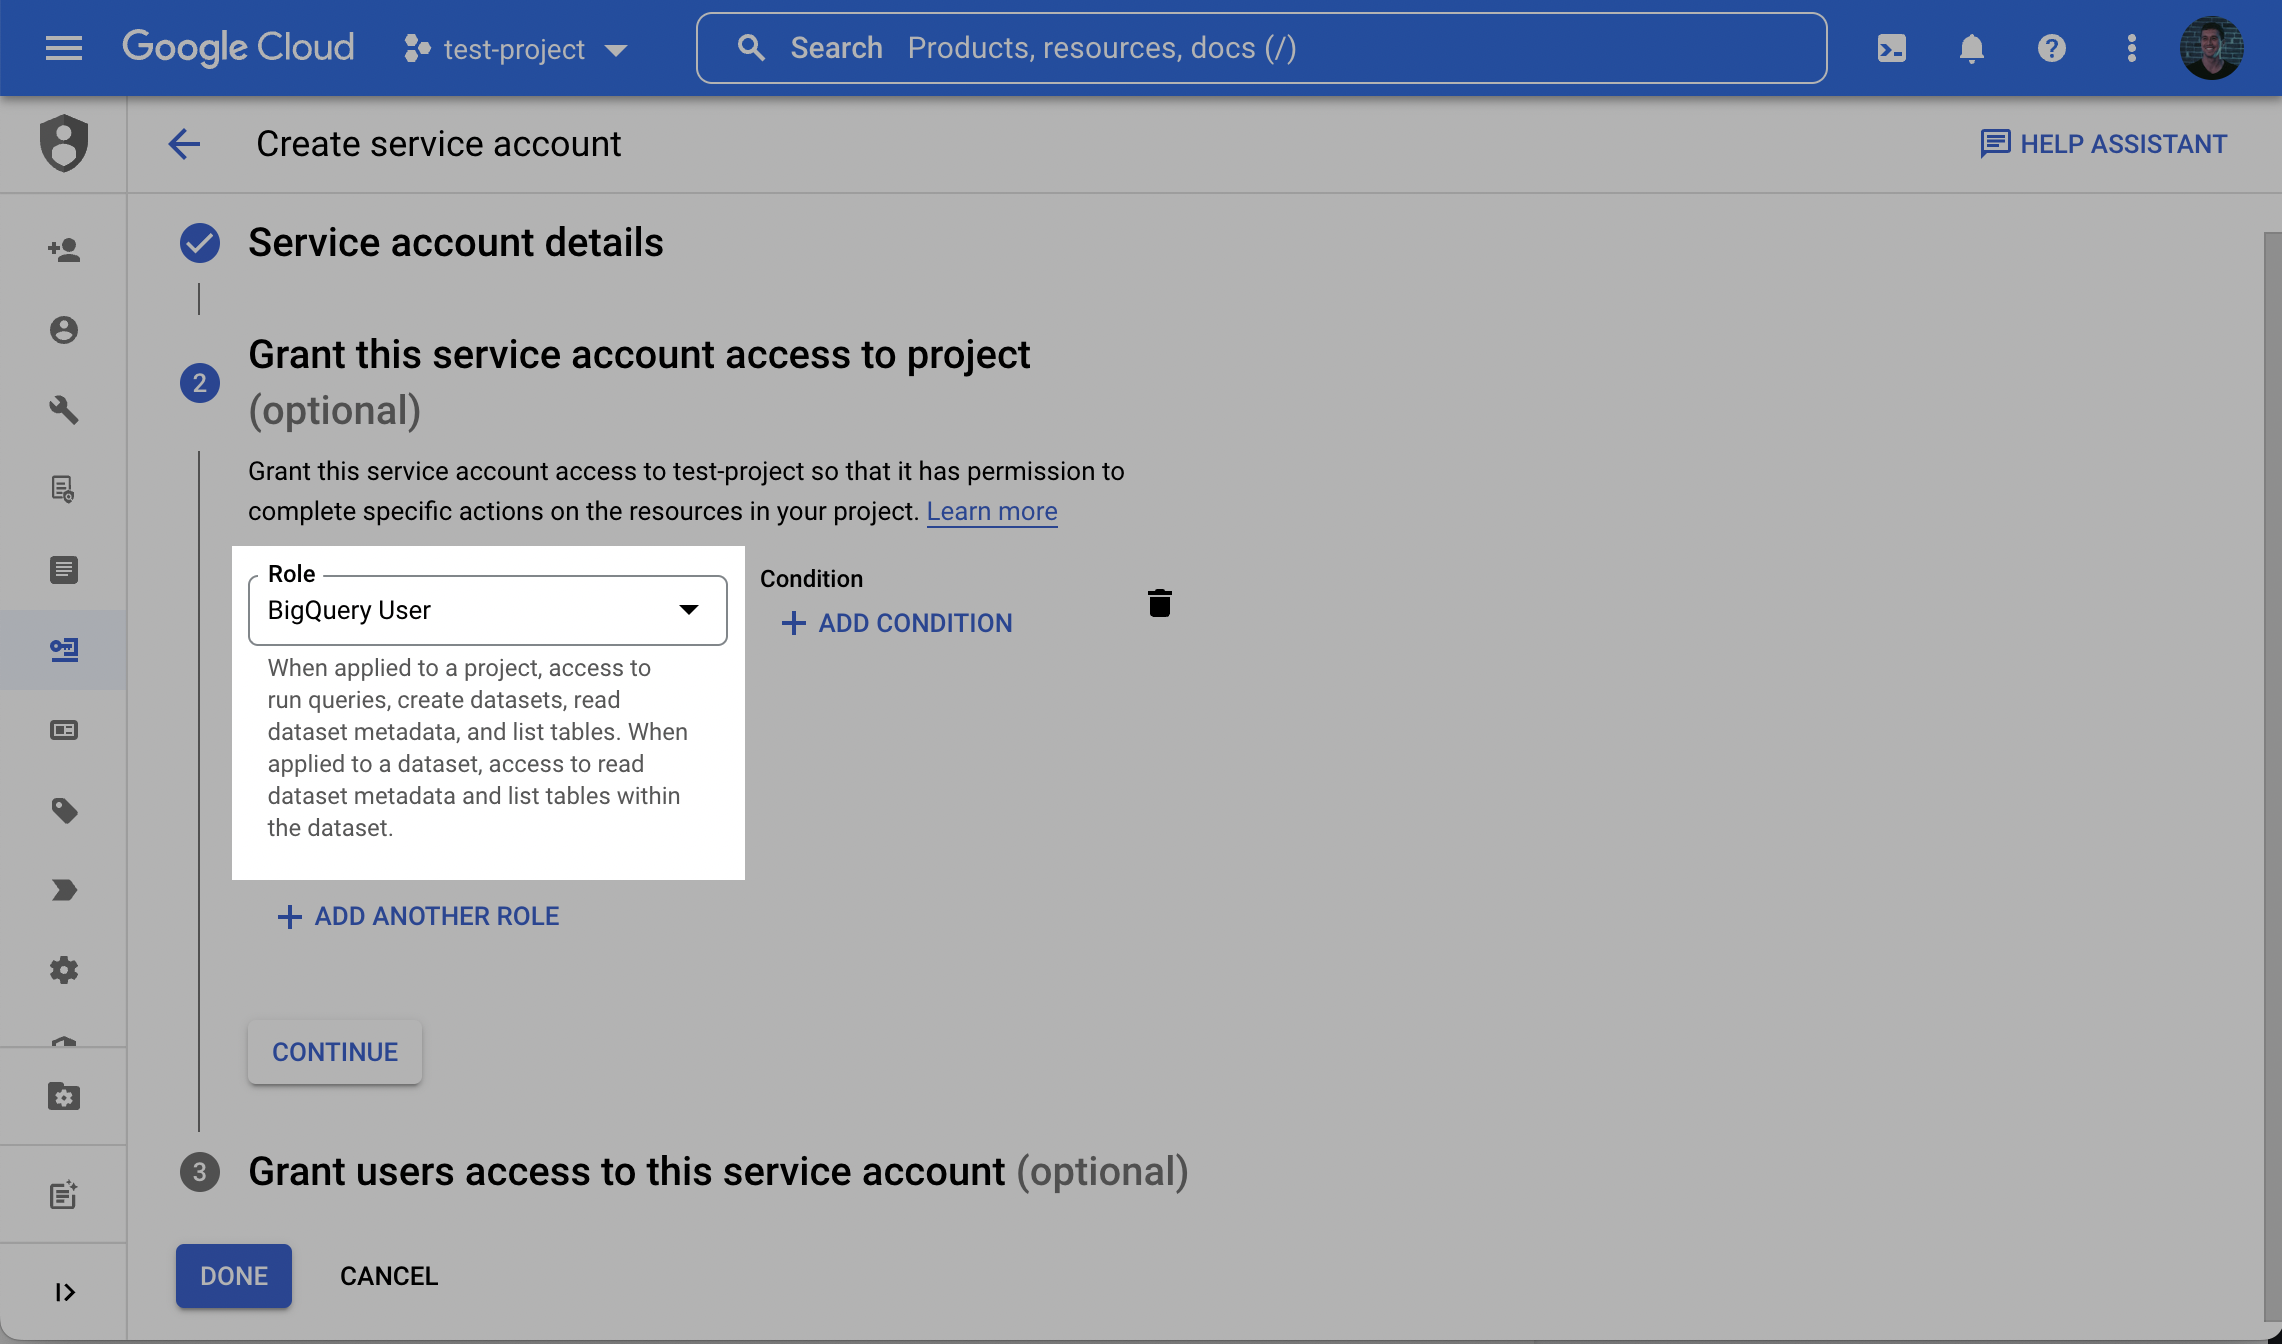
- In the first step, name the user and click Create and Continue.

- In the second step, grant the user the role BigQuery User.
Loading data into a dataset that already existsBy default, we will attempt to create a new dataset (with a name you provide) in the BigQuery project. If instead you create the dataset ahead of time, you will need to grant the BigQuery Data Owner role to this Service Account at the dataset level.
- In BigQuery, click on the existing dataset. In the dataset tab, click Sharing, then Permissions. Click Add Principals. Enter the Service Account name, and add the Role: BigQuery Data Owner
Note that the BigQuery User role is required at the project level regardless of whether or not you intend to use an existing dataset.
- In the third and final step, click Done.
- Back in the Service accounts menu, click the Actions dropdown next to the newly created service account and click Manage keys.

- Click Add key and then Create new key.

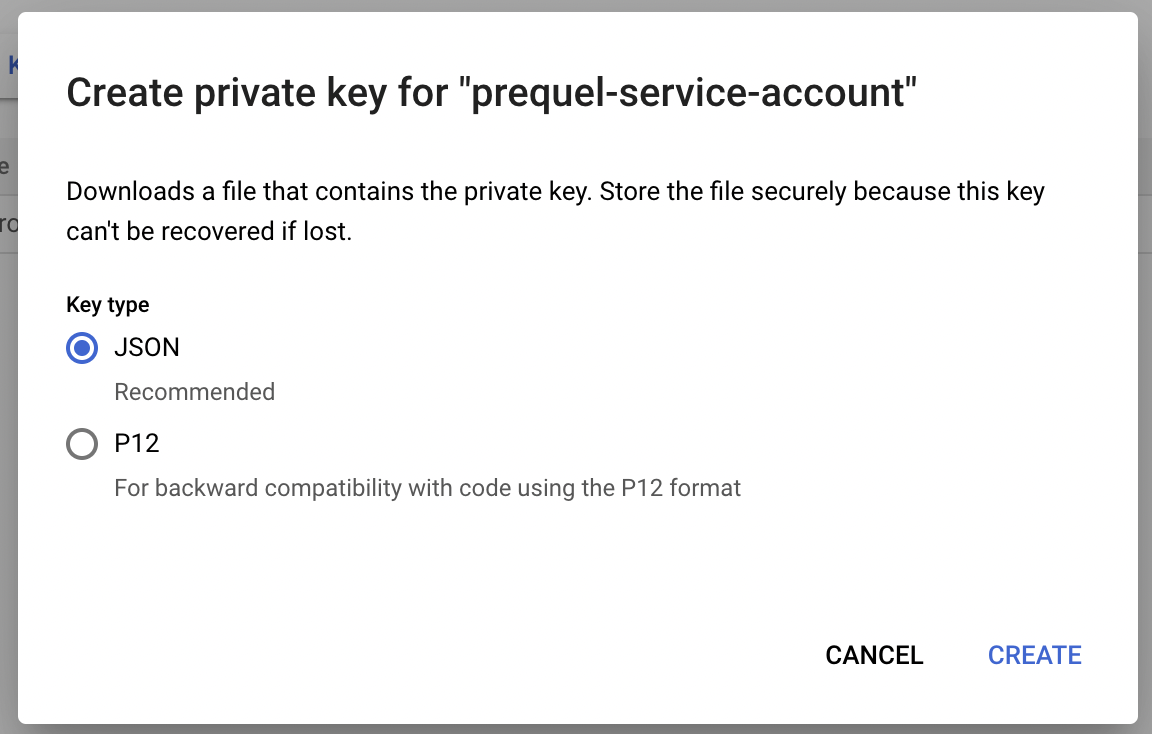
- Select the JSON Key type and click Create and make note of the key that is generated.
Step 2: Create a staging bucket
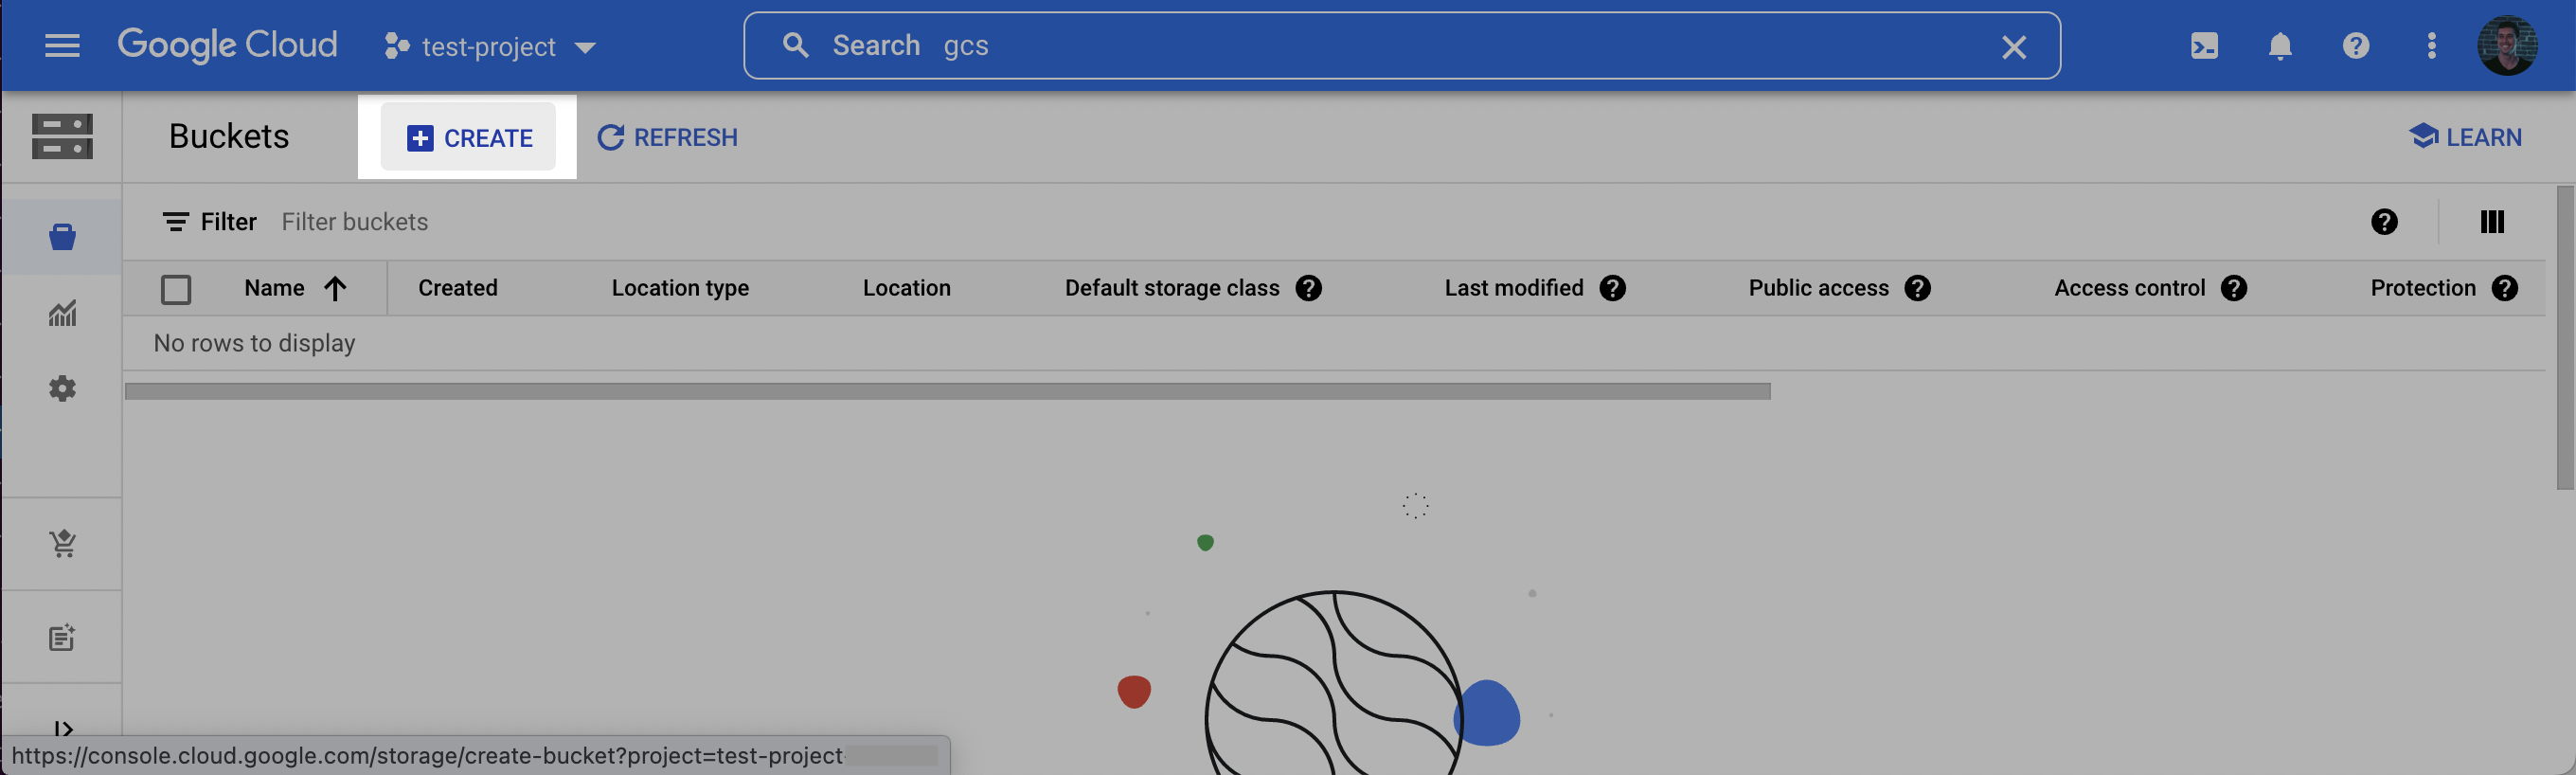
- Log into the Google Cloud Console and navigate to Cloud Storage. Click Create to create a new bucket.
- Choose a name for the bucket. Click Continue. Select a location for the staging bucket. Make a note of both the name and the location (region).
Choosing alocation(region)The location you choose for your staging bucket must match the location of your destination dataset in BigQuery. When creating your bucket, be sure to choose a region in which BigQuery is supported (see BigQuery regions)
- If the dataset does not exist yet, the dataset will be created for you in the same region where you created your bucket.
- If the dataset does exist, the dataset region must match the location you choose for your bucket.
- Click continue and select the following options according to your preferences. Once the options have been filled out, click Create.
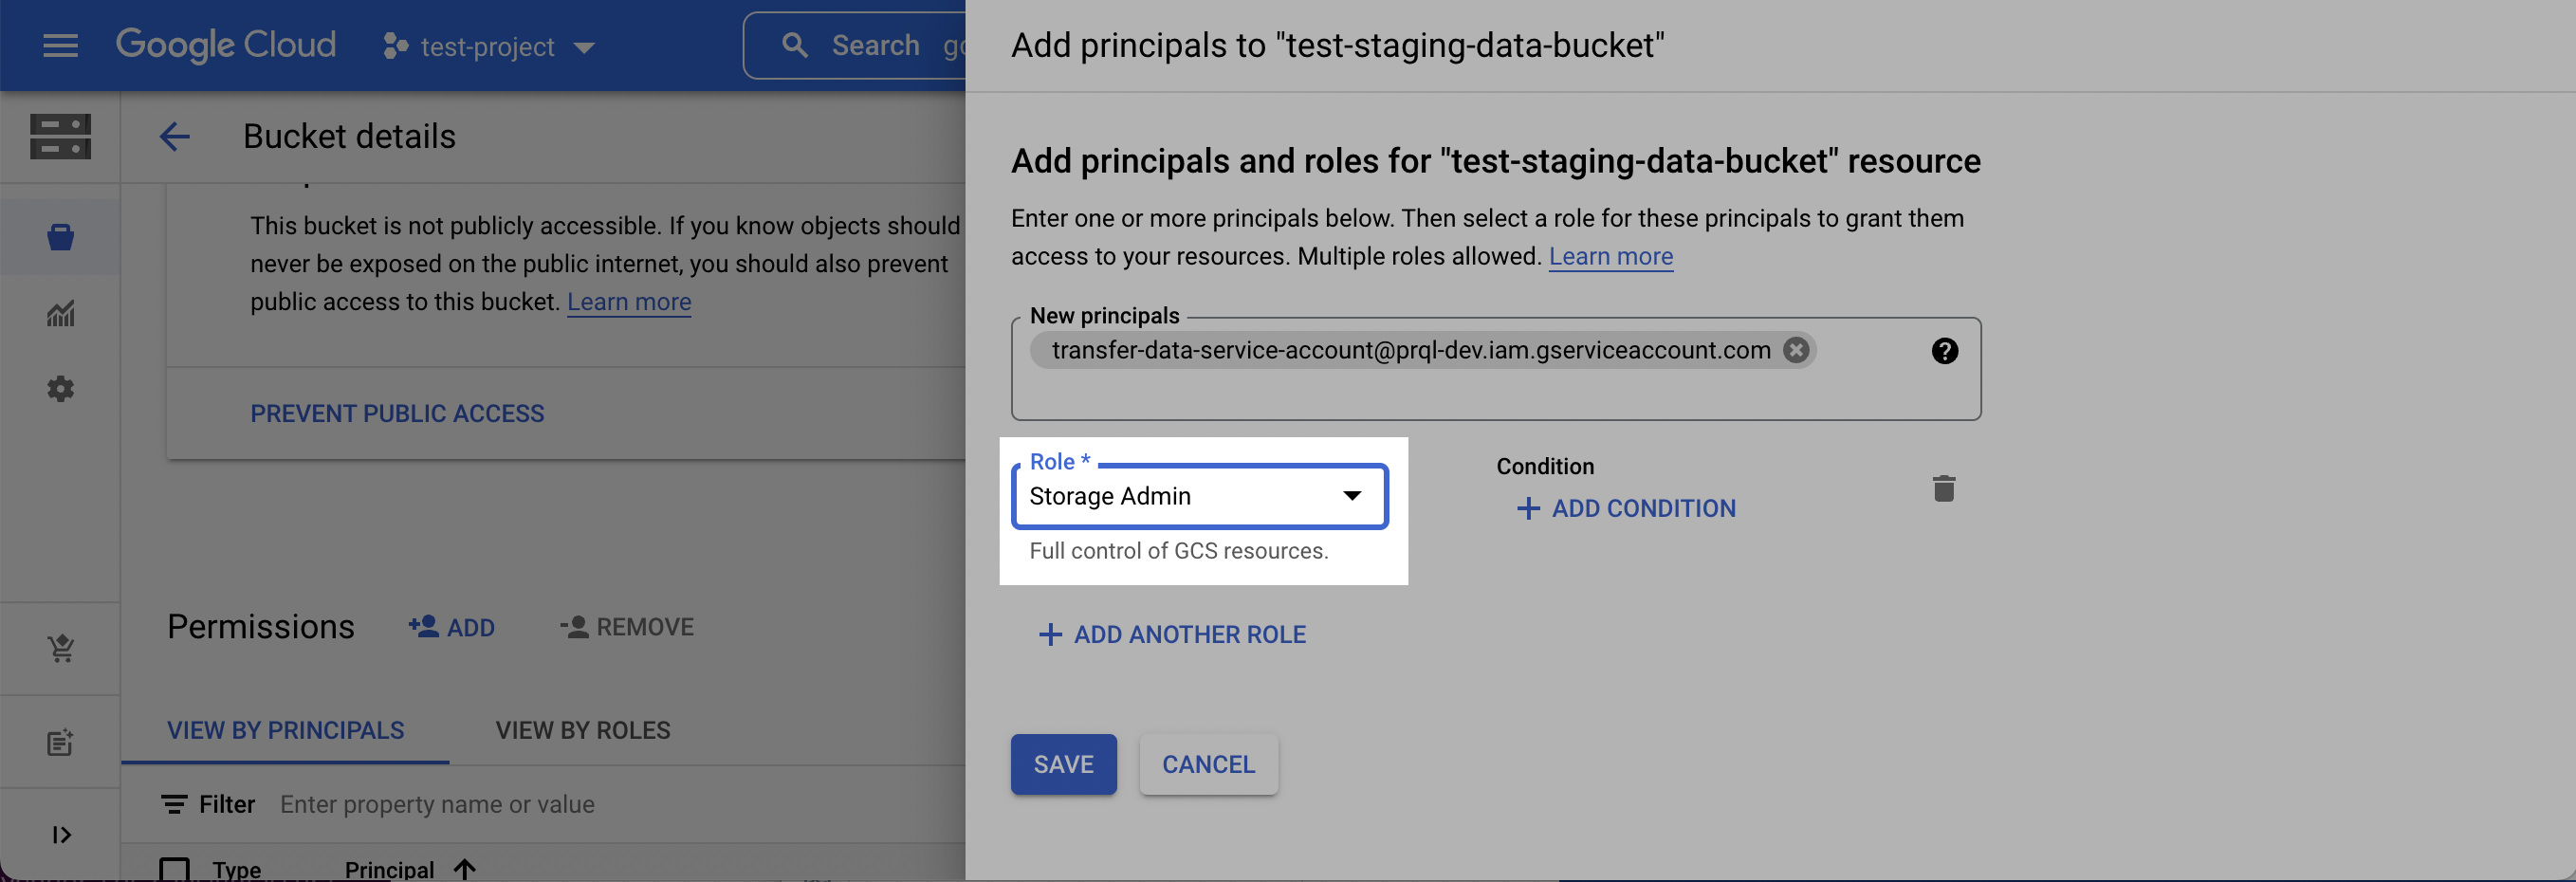
- On the Bucket details page that appears, click the Permissions tab, and then click Add.
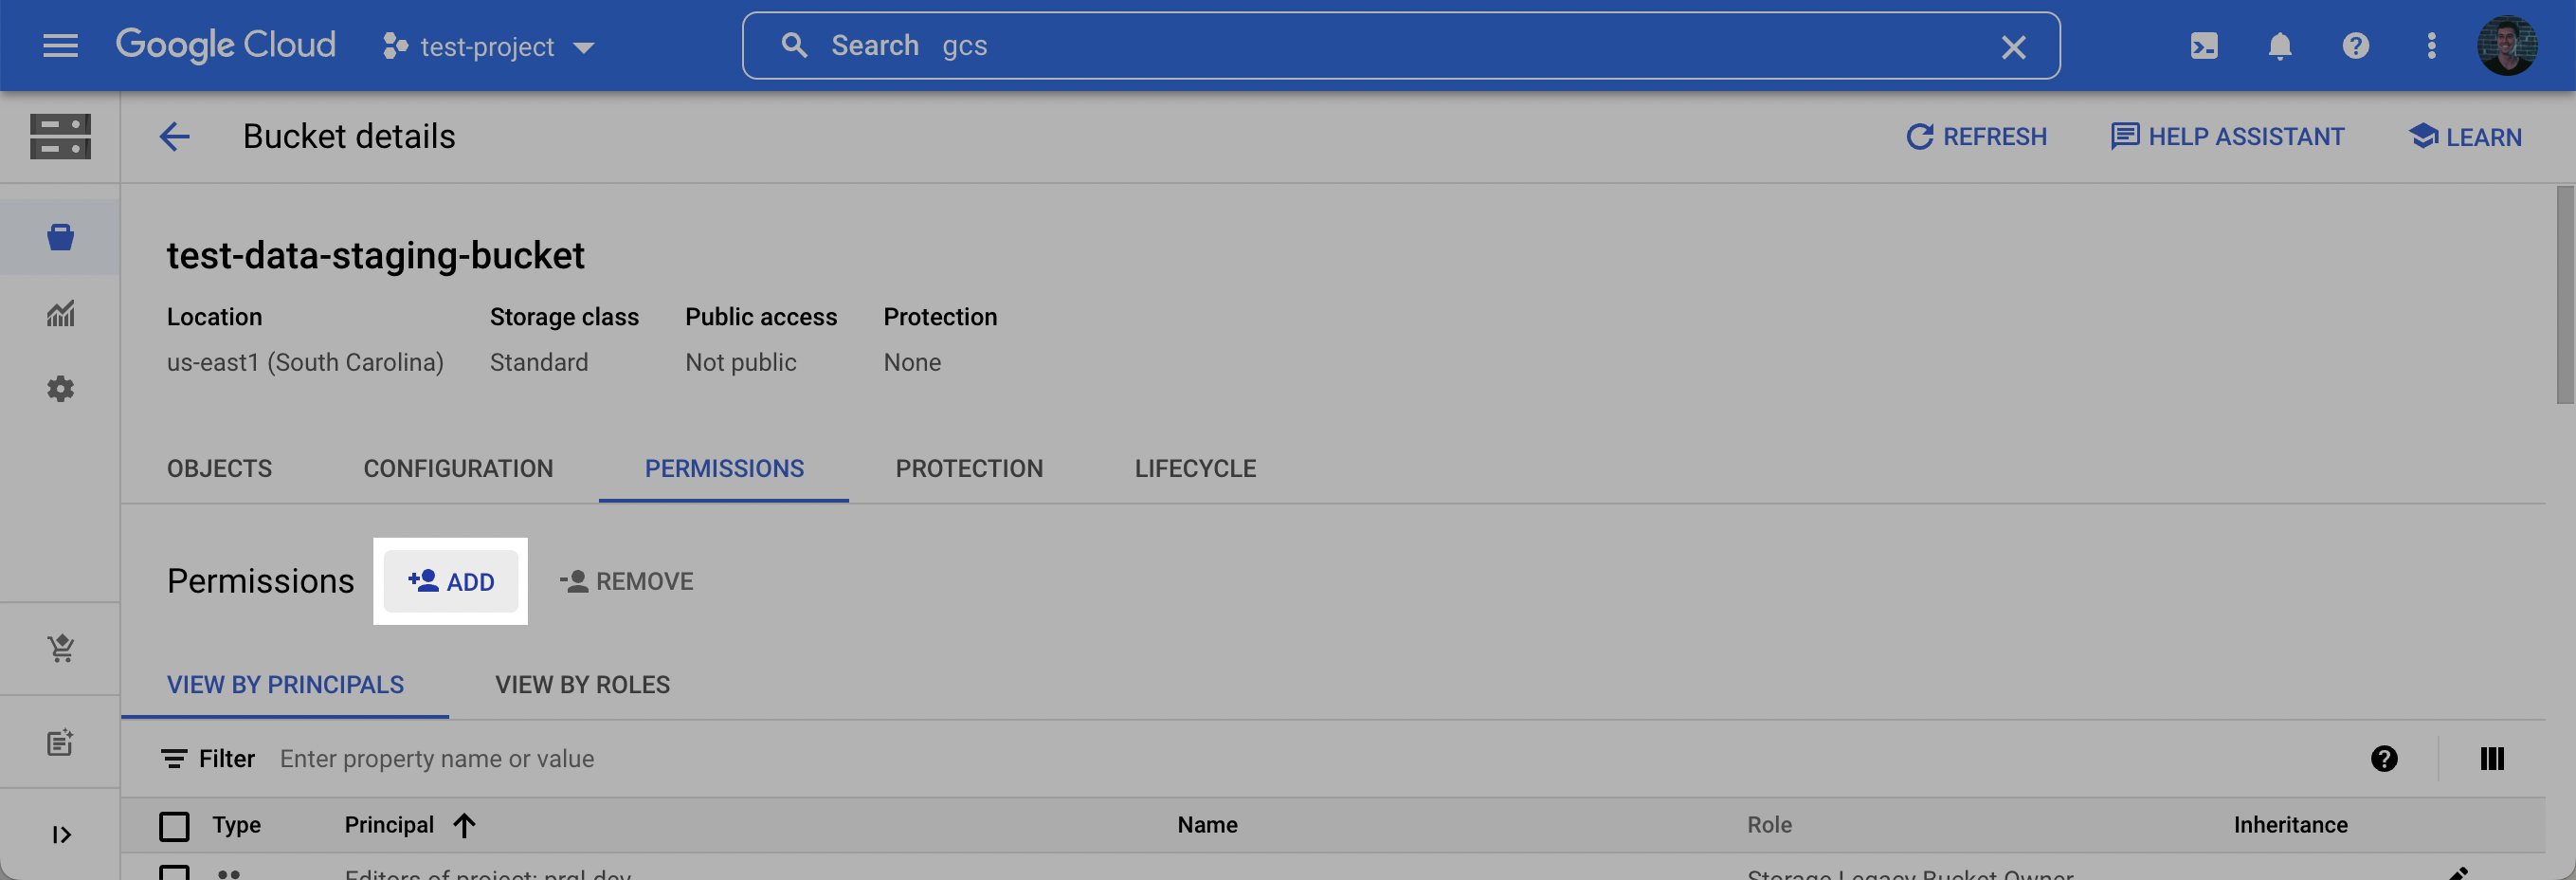
- In the New principles dropdown, add the Service Account created in Step 1, select the Storage Admin role, and click Save.
Step 3: Find Project ID
- Log into the Google Cloud Console and select the projects list dropdown.
- Make note of the BigQuery Project ID.

Step 4: Add your destination
- Securely share your Project ID, Bucket Name, Bucket Location, Destination Schema Name and Service Account Private Key (
.jsonfile) with us to complete the connection.